Application environment
This section provides a high-level overview on how to prepare a Tarantool application for deployment and how the application’s environment and layout might look. This information is helpful for understanding how to administer Tarantool instances using tt CLI in both development and production environments.
The main steps of creating and preparing the application for deployment are:
- Initializing a local environment.
- Creating and developing an application.
- Packaging the application.
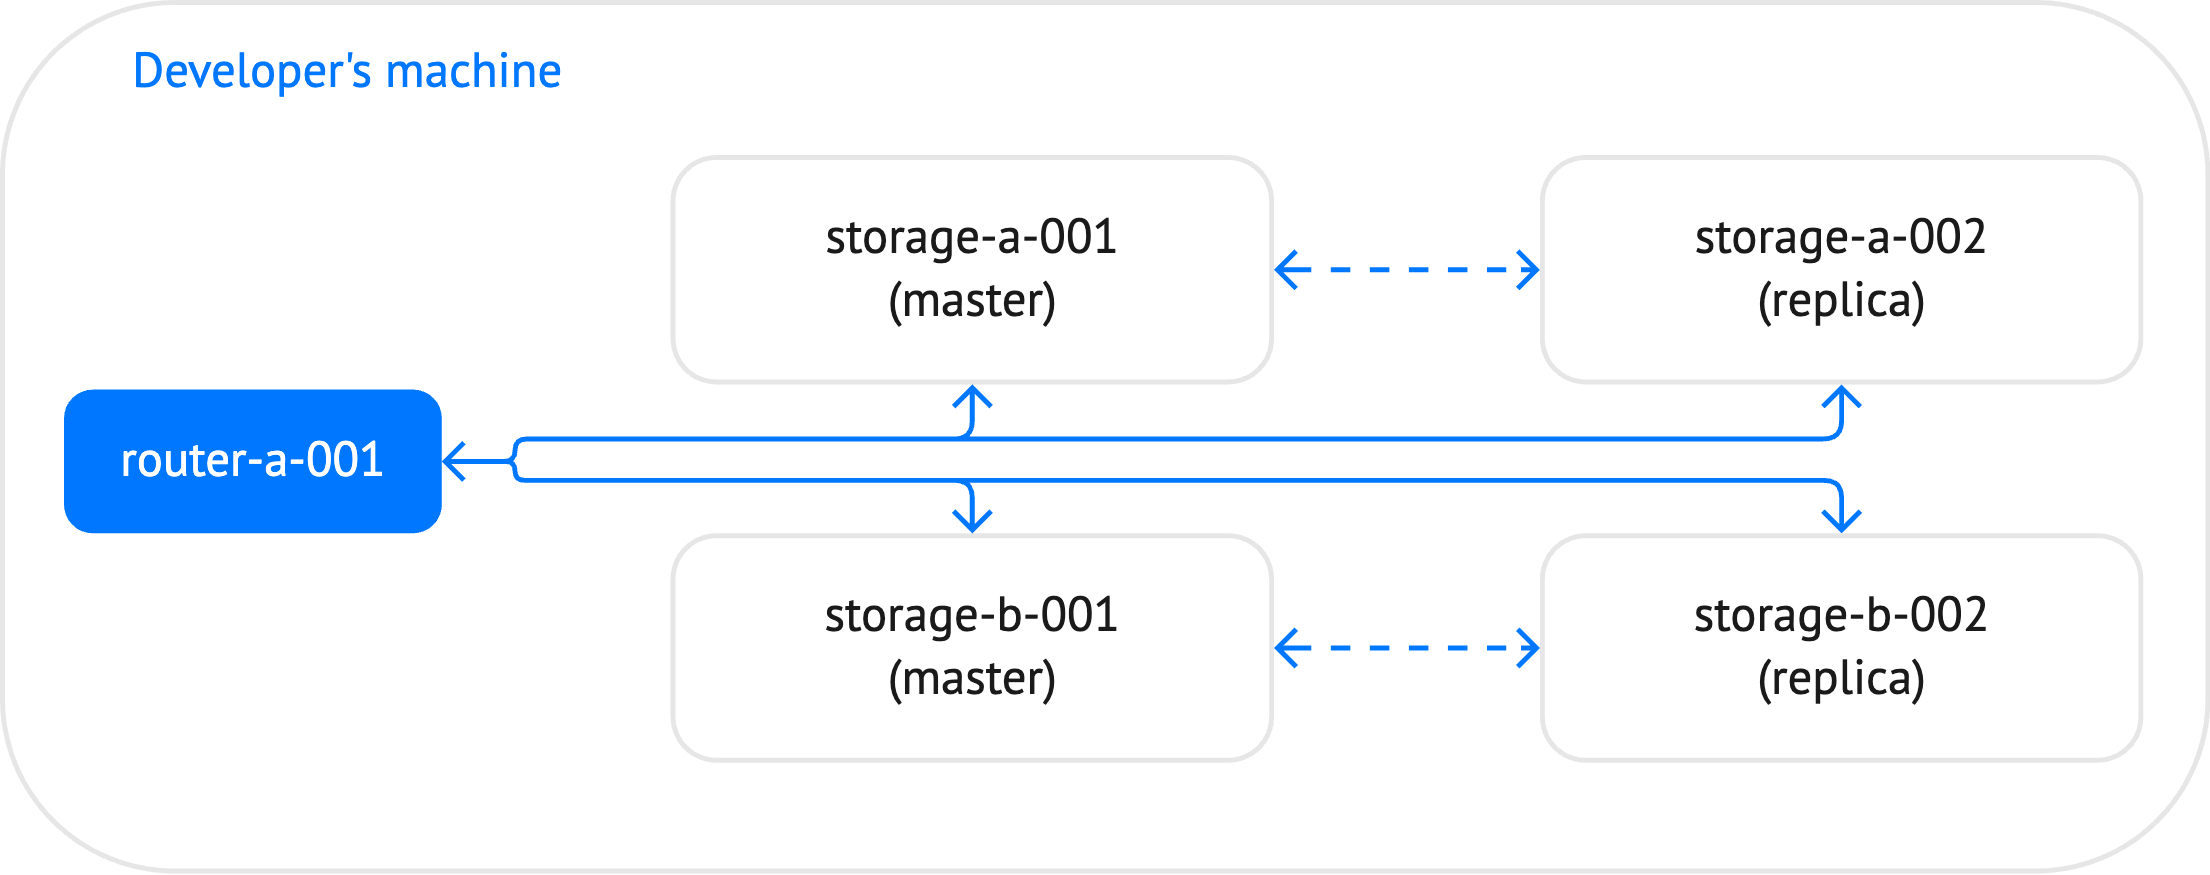
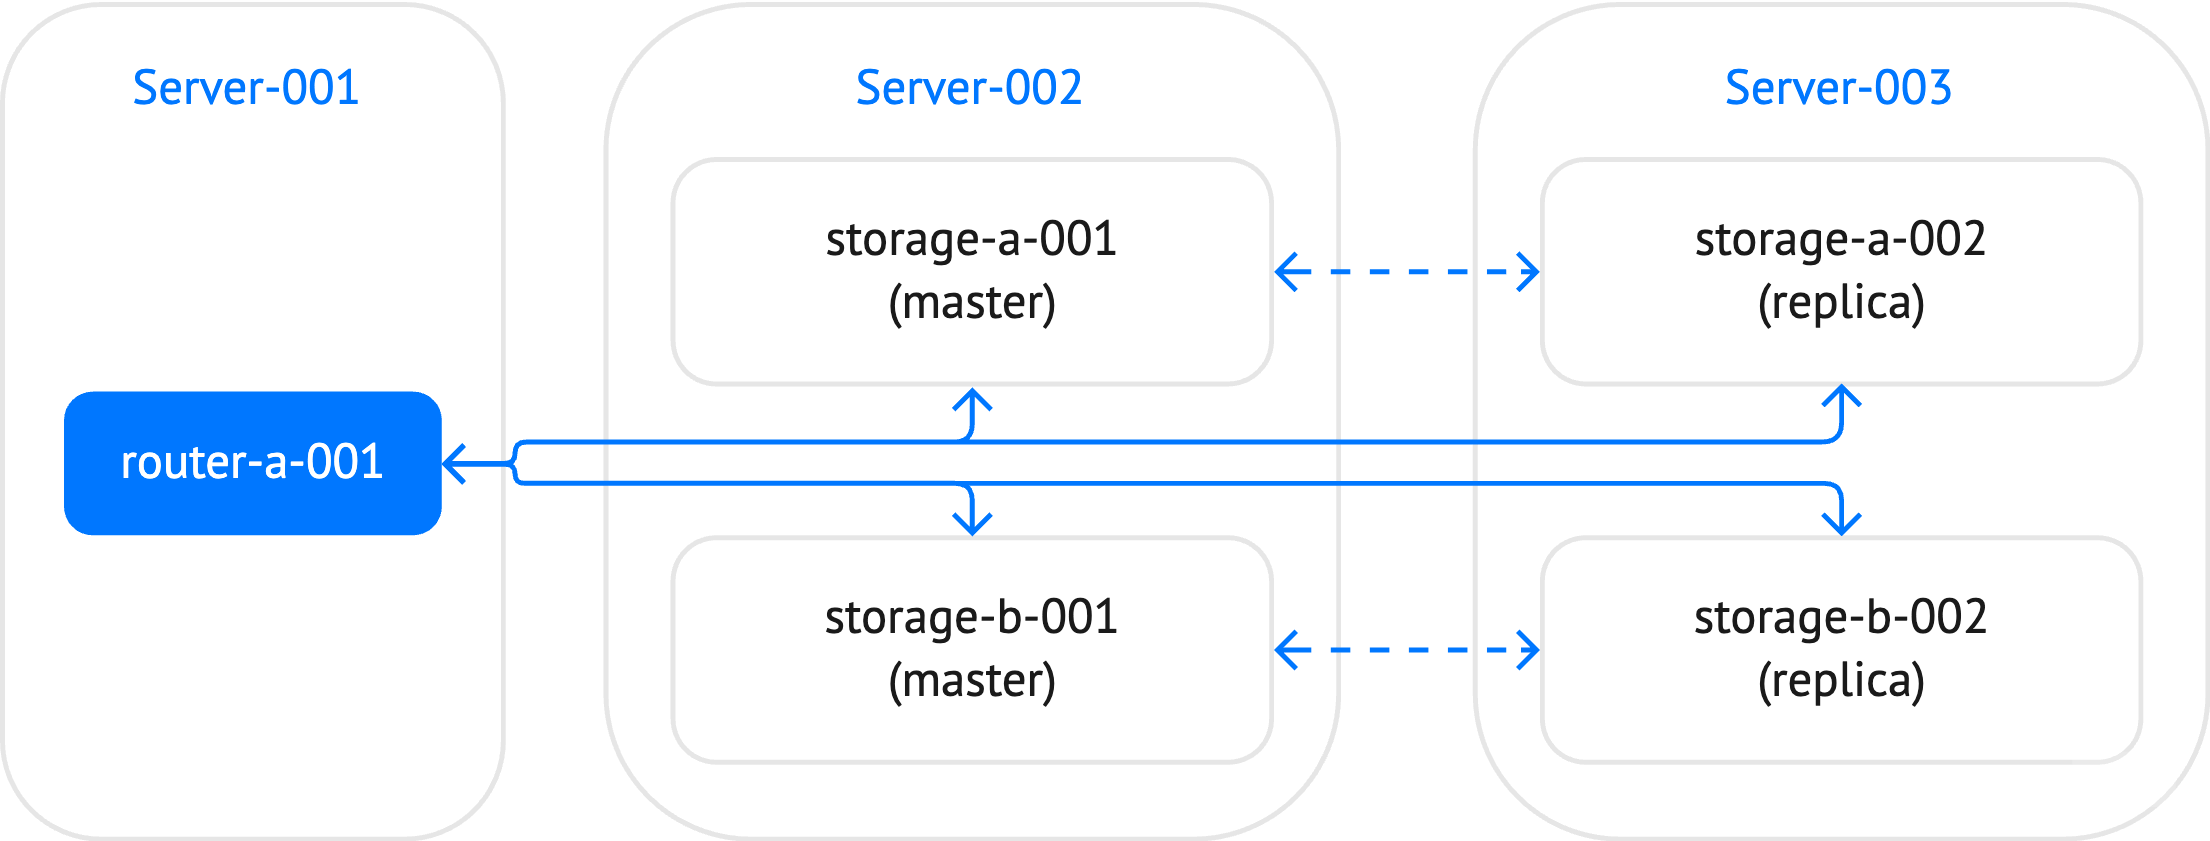
In this section, a sharded_cluster application is used as an example. This cluster includes 5 instances: one router and 4 storages, which constitute two replica sets.

Before creating an application, you need to set up a local environment for tt:
Create a home directory for the environment.
Run
tt initin this directory:~/myapp$ tt init • Environment config is written to 'tt.yaml'
This command creates a default tt configuration file tt.yaml for a local
environment and the directories for applications, control sockets, logs, and other
artifacts:
~/myapp$ ls
bin  distfiles  include  instances.enabled  modules  templates  tt.yaml
Find detailed information about the tt configuration parameters and launch modes
on the tt configuration page.
You can create an application in two ways:
- Manually by preparing its layout in a directory inside
instances_enabled. The directory name is used as the application identifier. - From a template by using the tt create command.
In this example, the application’s layout is prepared manually and looks as follows.
~/myapp$ tree
.
├── bin
├── distfiles
├── include
├── instances.enabled
│   └── sharded_cluster
│       ├── config.yaml
│       ├── instances.yaml
│       ├── router.lua
│       ├── sharded_cluster-scm-1.rockspec
│       └── storage.lua
├── modules
├── templates
└── tt.yaml
The sharded_cluster directory contains the following files:
config.yaml: contains the configuration of the cluster. This file might include the entire cluster topology or provide connection settings to a centralized configuration storage.instances.yml: specifies instances to run in the current environment. For example, on the developer’s machine, this file might include all the instances defined in the cluster configuration. In the production environment, this file includes instances to run on the specific machine.router.lua: includes code specific for a router.sharded_cluster-scm-1.rockspec: specifies the required external dependencies (for example,vshard).storage.lua: includes code specific for storages.
You can find the full example here: sharded_cluster.
To package the ready application, use the tt pack command.
This command can create an installable DEB/RPM package or generate .tgz archive.
The structure below reflects the content of the packed .tgz archive for the sharded_cluster application:
~/myapp$ tree -a
.
├── bin
│   ├── tarantool
│   └── tt
├── include
├── instances.enabled
│   └── sharded_cluster -> ../sharded_cluster
├── modules
├── sharded_cluster
│   ├── .rocks
│   │   └── share
│   │       └── ...
│   ├── config.yaml
│   ├── instances.yaml
│   ├── router.lua
│   ├── sharded_cluster-scm-1.rockspec
│   └── storage.lua
└── tt.yaml
The application’s layout looks similar to the one defined when developing the application with some differences:
bin: contains thetarantoolandttbinaries packed with the application bundle.instances.enabled: contains a symlink to the packedsharded_clusterapplication.sharded_cluster: a packed application. In addition to files created during the application development, includes the.rocksdirectory containing application dependencies (for example,vshard).tt.yaml: attconfiguration file.
One more difference for a deployed application is the content of the instances.yaml file that specifies instances to run in the current environment.
On the developer’s machine, this file might include all the instances defined in the cluster configuration.

instances.yaml:storage-a-001: storage-a-002: storage-b-001: storage-b-002: router-a-001:
In the production environment, this file includes instances to run on the specific machine.

instances.yaml(Server-001):router-a-001:
instances.yaml(Server-002):storage-a-001: storage-b-001:
instances.yaml(Server-003):storage-a-002: storage-b-002:
The Starting and stopping instances section describes how to start and stop Tarantool instances.

